Tom Alphin's Blog is moving.
I am switching from the Blogger platform to Wordpress. It will be more flexible and should encourage me to blog more often.
Unfortunately, if you follow my blog with a news reader, it may stop working. Please come back to http://tomalphin.com/ tomorrow to update your feed.
See you soon!
Labels: blogging
Building Raised Beds
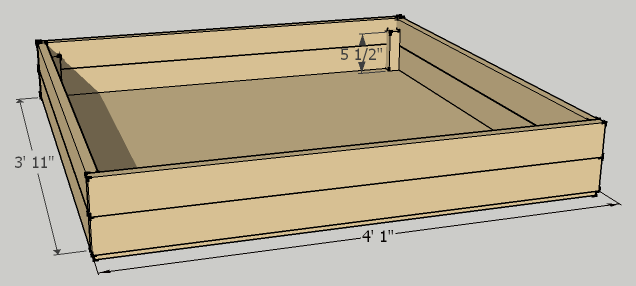
I thought it would be useful to include the schematic I used in building my newest addition to the garden in the form of three 7" tall 4'x4' raised garden beds which I built in the fall. You can make two raised beds following this template with the following materials:
- (1) 4'x8' 1/2" or 3/8" Plywood. Cut in half. (10$)1/2" is cheaper, but 3/8 will last longer. May depend on if you want to move it or simply provide a barrier for weeds.
- (8) 8' long 4" Cedar Decking. Cut into 4'1" and 3'11" sections. (3.50$ x 8 = 28$)These are 1" x 3 1/2". This allows you to use a complete section across the front of the box for aesthetics.
- (1) 8' long 2x2 Cedar. Cut into 8 5 1/2" sections. (4$)These are used to reinforce the corners. You could make them the full 7" tall, but this would not allow you to stack modular risers on your bed. I will talk about these later.
- (1) 1lb box of 2" outdoor rated wood screws. (8$)For attaching cedar to the corner braces.
- (1) 1lb box of 1 3/4" outdoor wood screws. (8$)For attaching the plywood base, and for the corners.
- Total: 58$, with plenty of screws left over for atleast two more beds.
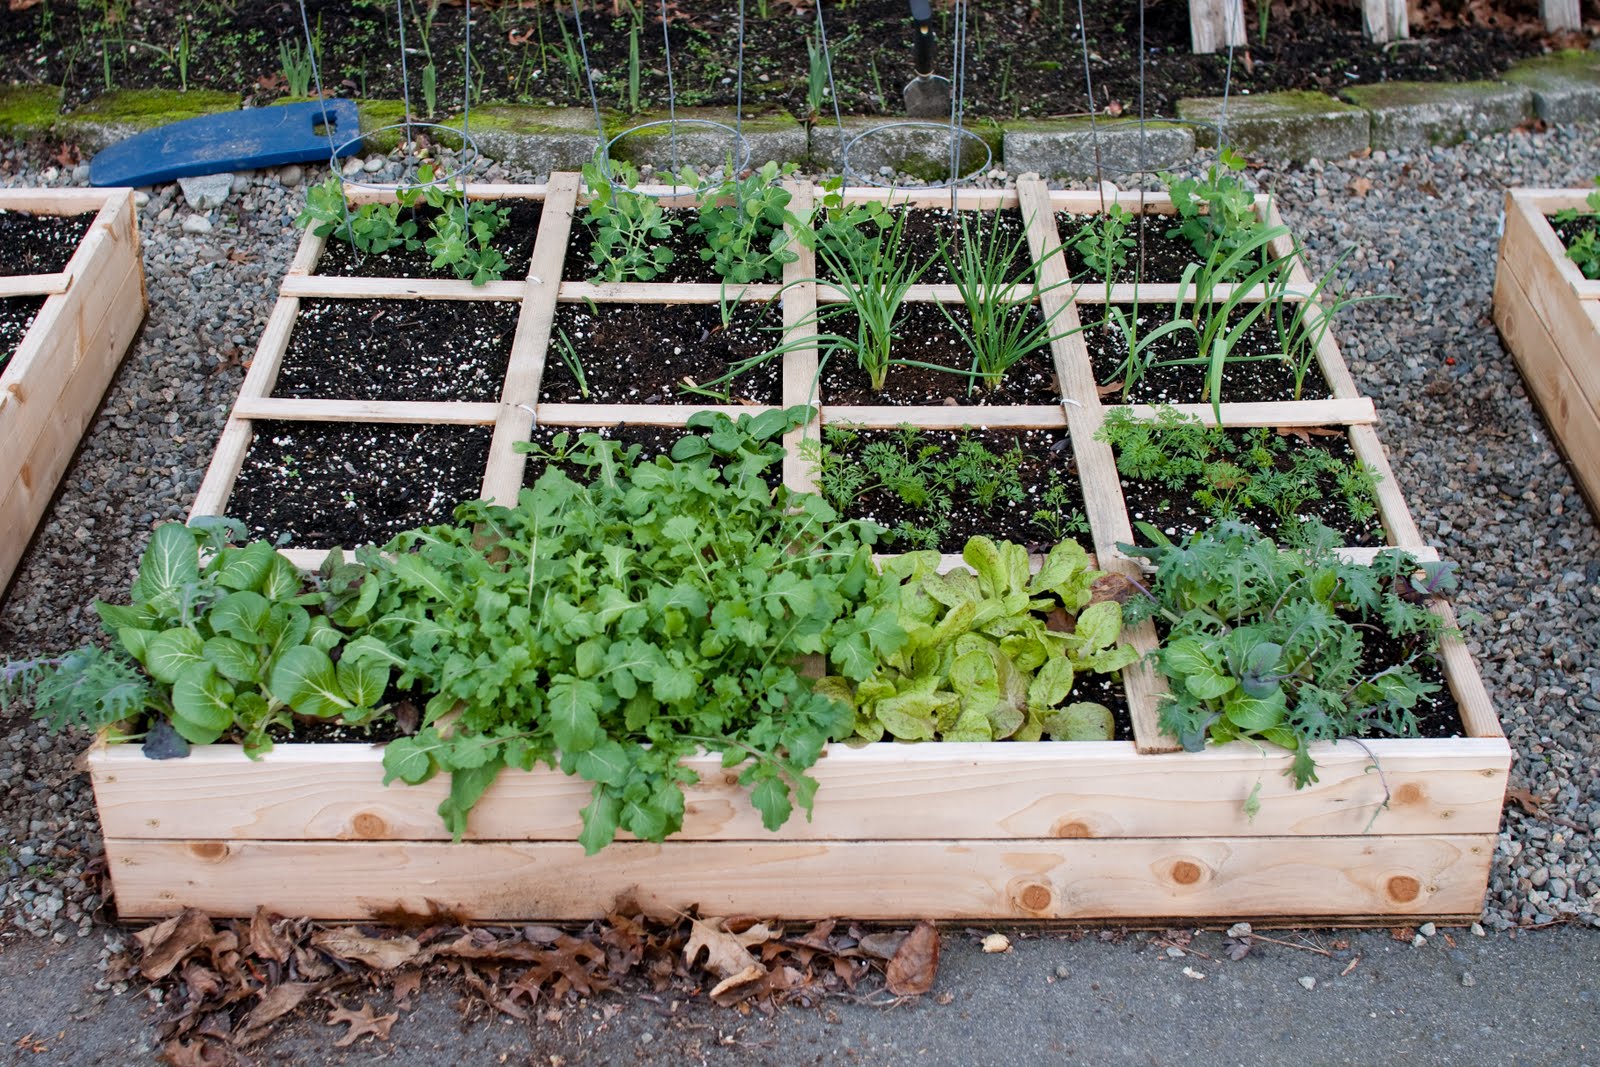
One of my three raised beds on December 6th containing Garlic, Shallots and Greens.
These are in addition to the 5 partially raised garden beds which I established in previous years. I built these beds with a plywood bottom because I simply placed them on top of the gravel along the side of the house. These beds occupy one of the two most parking spots on the property, so I did not want to make them permanent as they may not be desired when it is time to sell the house.
Labels: Gardening
Seeds!
I finished reading through my seed catalogues and cross referencing the offerings against my Maritime Northwest Garden guide. My goal was to increase both the variety, quality and uglyness* of this year's garden. I found that Seed Savers Exchange had the most seed varieties I wanted to get this year, so I will be ordering from them.
*Heirloom tomatoes are less attractive thain their mainstream siblings, but can be more flavorful.
Item | Price |
| Kraft White Self-Sealing Env. , 50 Envelopes (3.25x4.75") | $5.00 |
| Collection, Sunflower | $13.50 |
| Carrot, Danvers OG, Packet 250 seeds | $2.75 |
| Arugula, Sylvetta , Packet 500 seeds | $2.75 |
Broccoli, DeCicco , Packet 50 seeds | $2.75 |
Broccoli, Romanesco , Packet 50 seeds | $2.75 |
| Lettuce, Reine des Glaces OG, Packet 250 seeds | $2.75 |
Pepper, Marconi Red , Packet 50 seeds | $2.75 |
| Chard, Five Color Silverbeet OG, Packet 100 seeds | $2.75 |
| Runner Bean, Sunset , Packet 25 seeds | $2.75 |
| Tomatillo, Purple de Milpa OG, Packet 25 seeds | $2.75 |
| Tomato, Stupice , Packet 50 seeds | $2.75 |
| Tomato, Siberian OG, Packet 25 seeds | $2.75 |
| Tomato, Black Krim OG, Packet 25 seeds | $2.75 |
| Tomato, Green Zebra , Packet 50 seeds | $2.75 |
| Herb, Rosemary , Packet 100 seeds | $2.75 |
| Herb, Green Culinary Sage , Packet 250 seeds | $2.75 |
| Total: | $59.75 |
That's a lot of money for seeds! I need to see if someone wants to share some of these seeds with me. I will gladly share a seed packet with anyone in the area for half the price. I may also need to remove a few packets from my order before clicking 'Buy".
Thankfully, a seed packet will generally last 3-5 years. I am still successfully germinating seeds from 2005, and I haven't made any great attempt to preserve my seeds. Going forward, I am going to store my seeds in an airtight box with a few of those desicant gel packets in it to keep everything completely dry. I should store it in a cool dry location to increase the duration where they will be viable.
Seedy Thoughts...
Seedy Thoughts...
Labels: Gardening
Gardening in a Small Suburban Home
In 2006, inspired by the book "The all new Square Foot Gardening" I began gardening in earnest along the side of our small suburban home. I began with four 4x4 foot partially raised beds. They were established in the four foot area of gravel between the deck and the small road which goes by our house to access 8 homes.
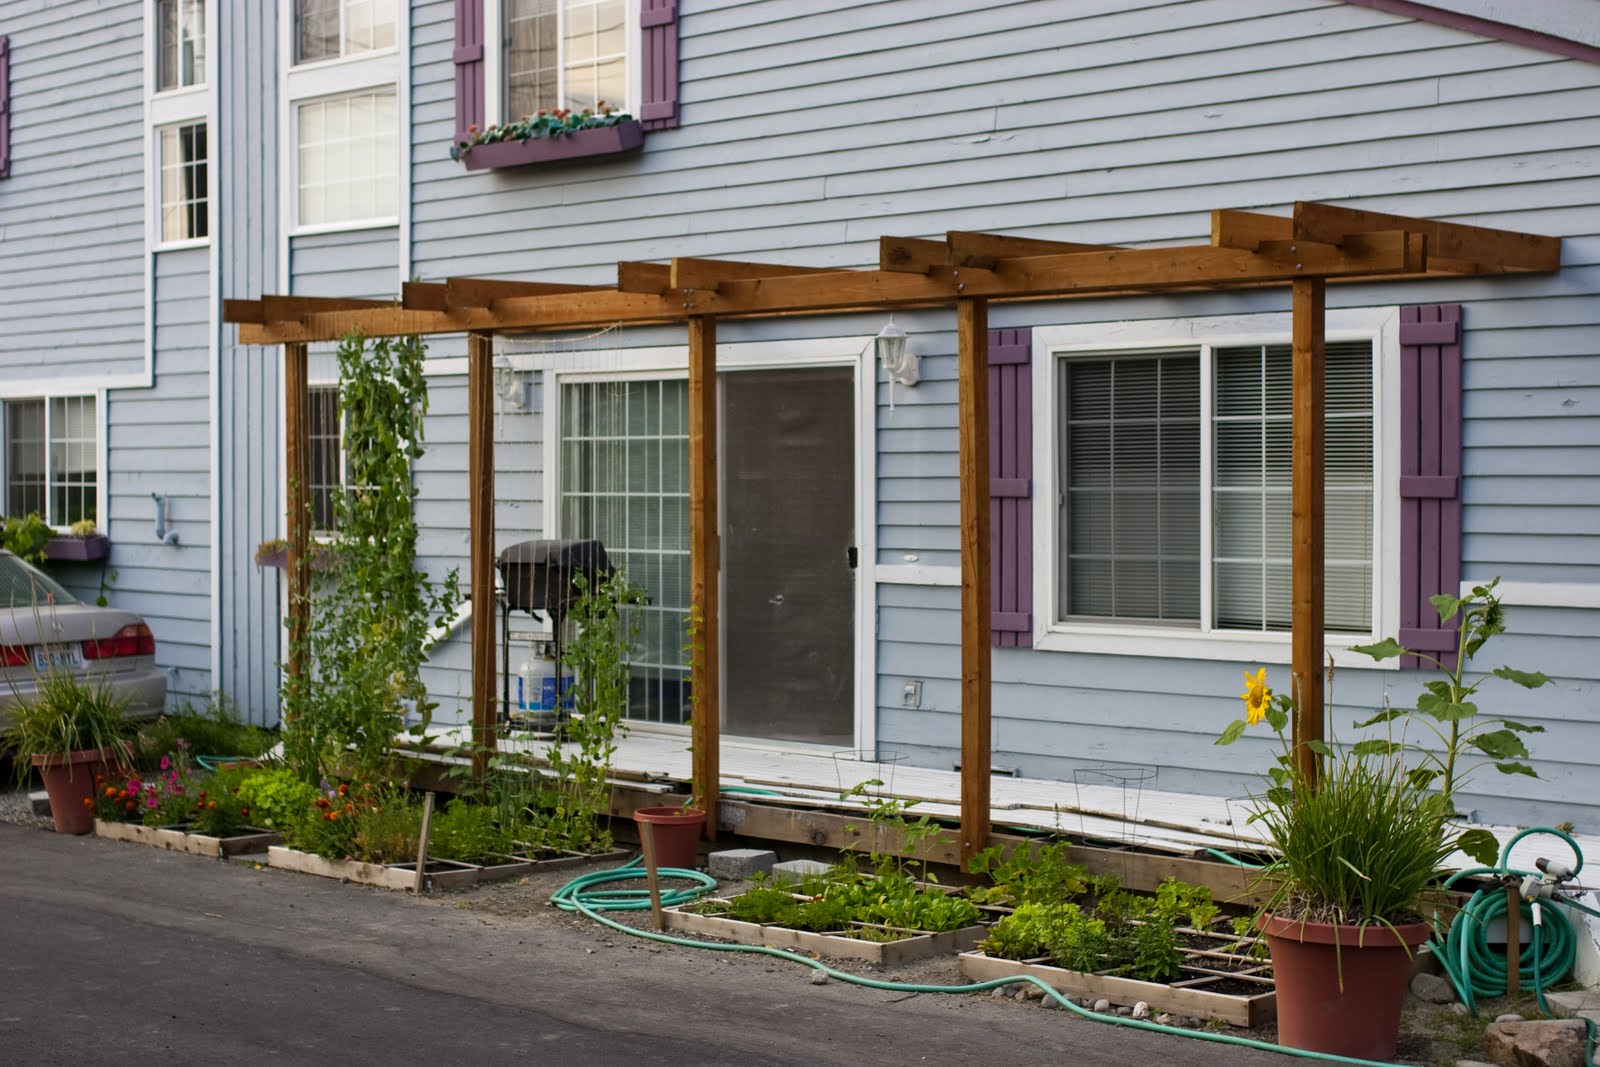
The garden's first year was the same year that I added the pergola.
The first year I established beds about 12 inches deep. I achieved this by removing the layer of gravel on top, then digging a square 4x4 foot hole to about 8 inches deep. I put the soil aside on a tarp on the road.
Soil
To remove rocks and break up the heavily compacted soil which had a good deal of clay in it, I built a Soil Sifter of wood and a coarse metal screen called "hardware cloth". It slides on a platform which I place over the planting area. The screen removes anything larger than a centimeter, and I have since created an insert for situations where I want to sift the soil even finer.

Breaking up the soil and removing rocks with the Soil Sifter which I built.
I added a quarter of a large bag of Vermiculite (about a cubic foot), about a cubic foot of Peat Moss to each bed, and about two cubic feet of compost. This resulted in a 12 inch deep bed of loose composition which exteded 4 inches above the original soil level. Note: I did not recreate the "Mel's mix" ratio of 1/3 compost, 1/3 vermiculite and 1/3 peat moss which the square foot gardening book recommends; partly because it seemed overkill and partly because isn't very cost effective given the high const of peat moss and vermiculite.
More recently, I have even greater concerns with his guidance. Peat moss is a hard product to harvest sustainably, and vermiculite is neither local or especially sustainable. My mixture, which uses a good deal more locally sourced compost than recommended, along with existing soil and a little peat/vermiculite has worked well for most of my crops. It also saves money.
Deeper beds?
I am constantly working to increase the depth and richness of the soil. My general approach to enriching the soil has been to make each bed deeper by removing and putting aside the enriched soil, then digging the hole deeper than the previous year. The hard packed soil and clay I remove is filtered and mixed with the enriched soil and additional compost to fill the hole back up. At this point, three of my five beds are 18 or more inches deep.
To be honest, I have not done any analysis to determine if the deeper beds perform better than the shallower ones. One thing I have noticed however is that the deep beds settle significantly more over the growing season. In the most extreme case, one of my beds ended this season 3 inches shorter than at the beginning of the season. Some of this can probably be attributed to material leeching into the surrounding soil, some is lost to the plants produced during the year, but I suspect the majority is simply the result of the soil settling during the year. I will certainly loosen the soil before replanting next year to keep it from getting permenantly compacted, but I do think a certain amount of settling is normal.
One topic that continues to baffle me is "Soil Structure". The Maritime northwest garden guide states that it is important to both rotate your crops to prevent diseases which target a particular type of crop, and to not overwork the soil as it can damage the soil structure. I do not entirely understand what soil structure is, and why an established garden with a specific siol structure ould outperform a new garden with the same soil fertility. I am going to try and implement a basic crop rotation, as the benefits make sense, but for now, I will continue to rework the soil every year until I understand better. (I'm sure that this is similar to why you shoudn't scrub a cast iron pan. Over the years the pan develops a natural nonstick coating which is difficult to recreate quickly, but easy to scrub off.)
Just a Hobby...
The time spent gardening I give up freely. At this scale, it is just an edible hobby. The value of a year's production is probably close to my annual expense. I have estimated my annual expense around 150$ per year, over the 4 years I have been gardening. Some years I just add compost to re-enrich the soil, but others I have added watering systems, additional beds, or bought a lot of seeds.
Favorite Crops...
Our favorite crops are those which produce well with little cost and effort.
Snow Peas in the Spring and Fall and Pole beans in the heat of Summer are our bumper crop, easily producing enough beans most weeks to use in 3 meals. The back row of each of our beds is dedicated to beans, with strings supporting their growth up to the pergola.
Tomatoes are also a favorite, anthough the relatively short Seattle summer has made them iffy at best. We tend to have no tomatoes util the very end of August, when we are inundated with production. Unfortunately, more than half the flowers which form into tomatoes do not reach maturity on the vine. Thankfully, many do ripen completely if brought inside and placed by the windowsill. This was a great discoverly as we tried it this year for the first time.
Basil is also difficult as it likes hot sunny days. We tend to see plenty of it in August and September, but sometimes it does much better than other years.
Spinach in the early spring and lettuces in spring and fall. Not a high value crop, but a salad or sandwich with fresh lettuce is something to be proud of.
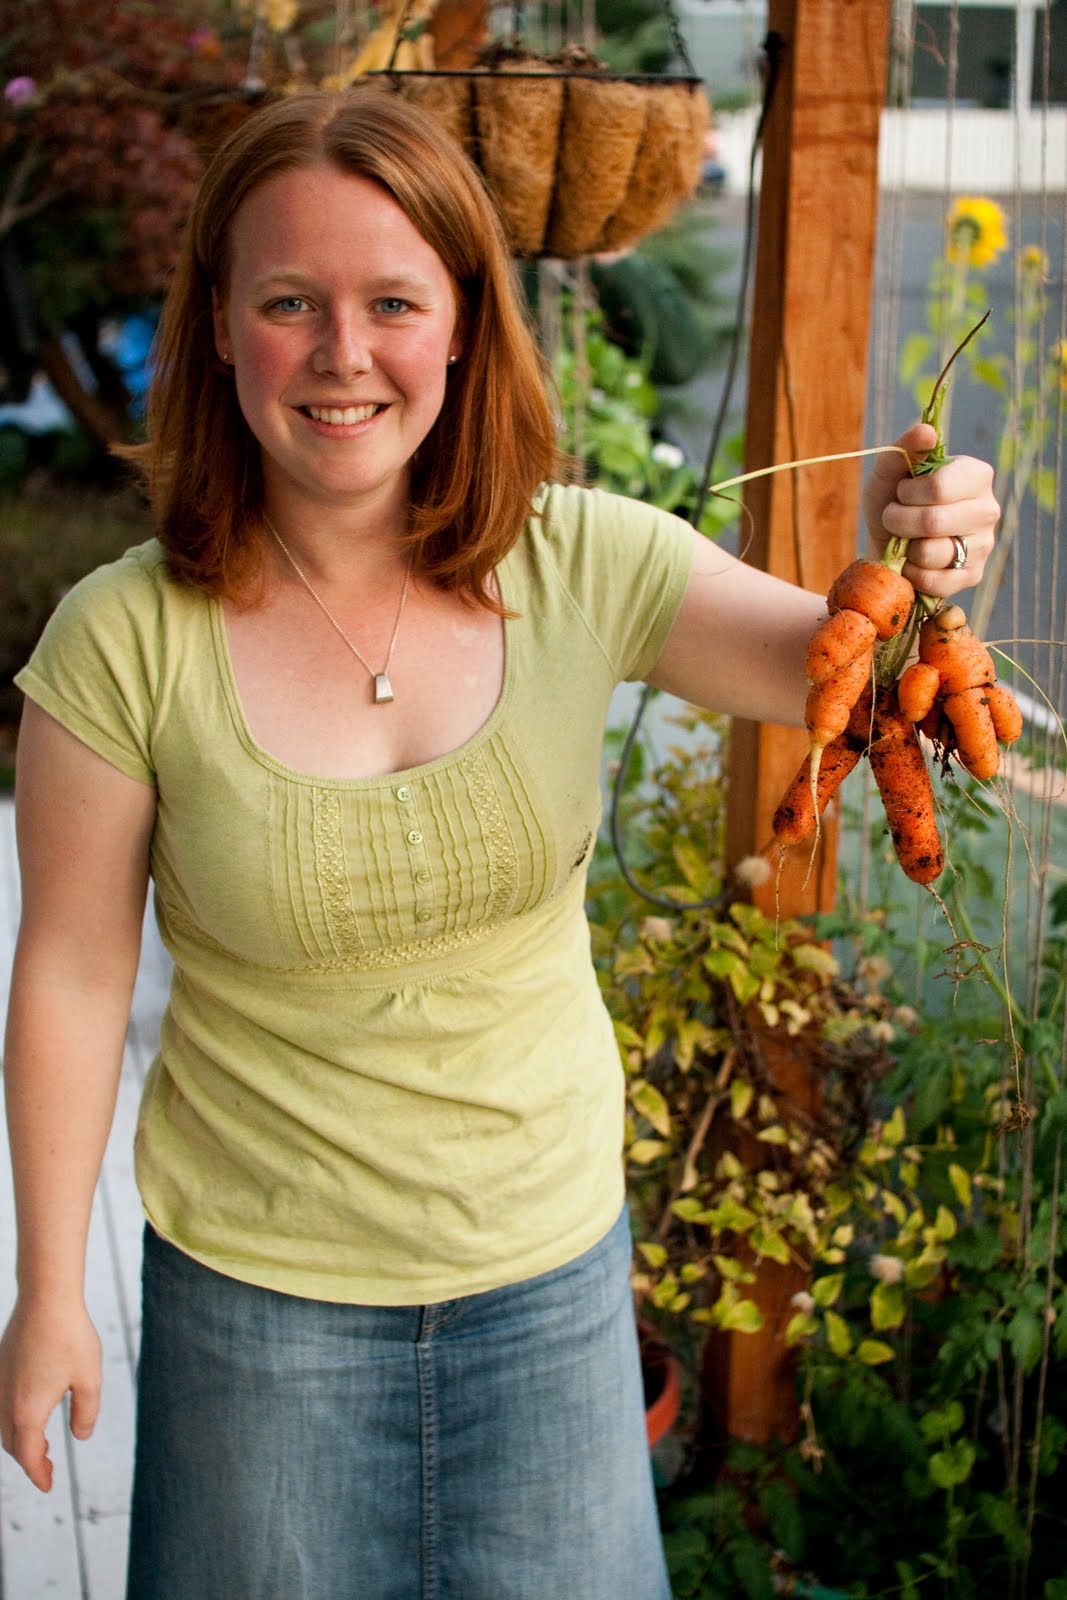
Carrots! (and an Amy!)
Some years, we have gotten a good crop of Bok Choy, but recently we have had issues with either being eaten by bugs, or bolting to seed too quickly.
Peppers have never been productive for us. We tried Okra this year on a whim (and a 50 cent seed packet) and got three okra pods out of two plants. Novelty, but not something to rely on. Squash has also been tough for us. I think that it needs more space than we have been willing to give it.
Resources...
In addition to the Square foot gardening book itself which was an inspiration for my garden, The most useful guide to gardening in the northwest is the aptly titled "Maritime Northwest Garden Guide" prepared by Seattle Tilth, a local organization which helps people grow their own food locally, organically and sustainably. It is based around an annual calendar, which a chapter calling out wat you should be doing each month of the year. It incudes recommendations on when you should start seeds indoors, when you can plant other seed types indoors and specific seed and plant varieties that have been tested and proven in the Seattle Area.


My primary gardening resources.
Beyond this, Seed Catalogues offer a good deal of inspiration, and a source for more options than your local Home Depot. (although I buy many of my other supplies there.)
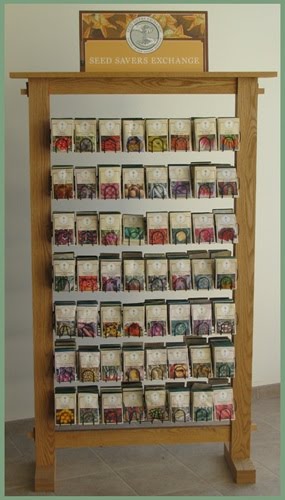
- Seed Savers Exchange is an interesting organization which specializes in unique and specialty seeds. Many of their seeds are organic, and members gain access to a network of hobby gardeners which offer up additional seed varieties.
- Territorial Seed is a large seed manufacturer and distributor in Oregon. The offer many varieties which are especially well suited to this region.
It turns out that chemical/agricultural giant Monsanto bought this and many other seed companies in 2005, butI do not think that this prevents them from producing the same quality, non GMO seeds which they built their business on. Territorial Seed also has a sister company, the Abundant Life Seed Company, which sells only Organic seed.
Labels: Gardening
Strange Celebrations
The New Year begins on a rather unlikely day of the year; it is too early to be the coldest day on average, and it misses the shortest day of the year (winter solstice) by a little over a week. So why not celebrate this unlikely holiday with an unlikely tradition.
For years, I have used this day as an excuse to plunge myself into the nearest body of water, my own "Polar Bear" swim. In looking back through old photos and videos, I am pretty sure the first time I did this was in 2000, but it may very well have gone undocumented in 1999 or 1998. There isn't a lot of pomp and circumstance involved, the only real criteria is to completely submerge myself in the water, if only briefly.

2000/01/01 - Severna Park
2001/01/01 - Severna Park

2004/01/03 - Pittsburgh
2005/01/01 - Severna Park
More recently, I have celebrated at nearby Waverly Beach Park in Kirkland, WA. This celebration has been a solo expedition, both being rather quick swims. In 2009, I got to perform for Amy's Dad and Sharon who were visiting. I'm glad he still let us get married.

2008/01/01 - Kirkland
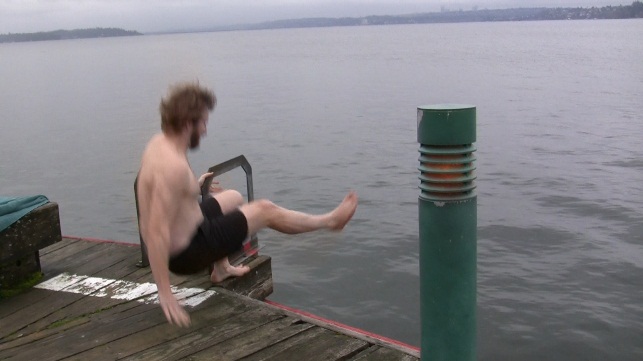
2009/01/01 - Kirkland
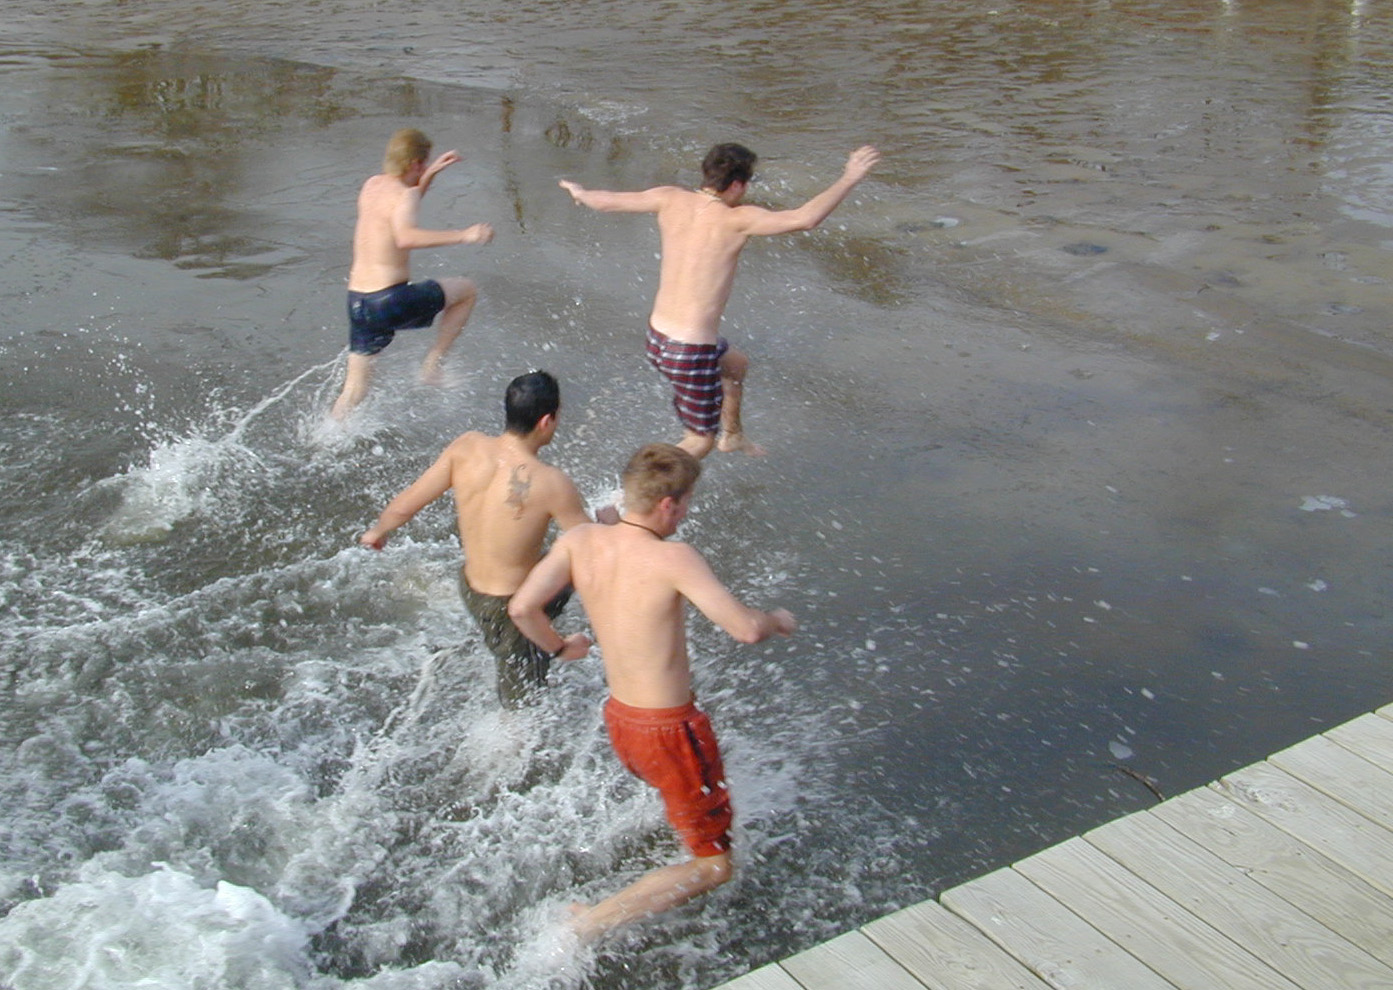
Due to my absentimindedness, I had nearly forgotten my annual tradition until we were making dinner. Since Andre and Ellie were coming for dinner, I called to warn them about the post-dinner festivities. They decided to bring swimwear, and lo-and-behold, they decided to give it a try. This year I was pleased to have co-participants instead of just gawkers. (Amy has no interest in joining in the swim, but is aways happy to hold the camera.) Andre and Ellie took the plunge too.

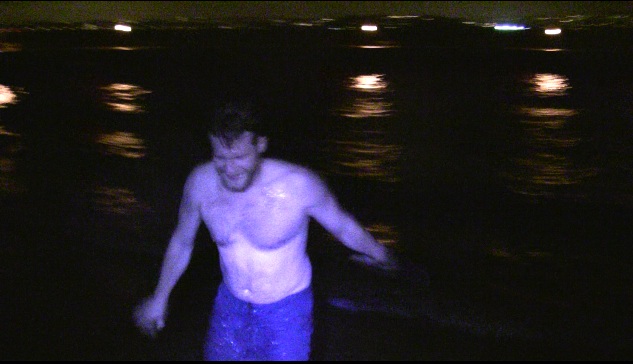
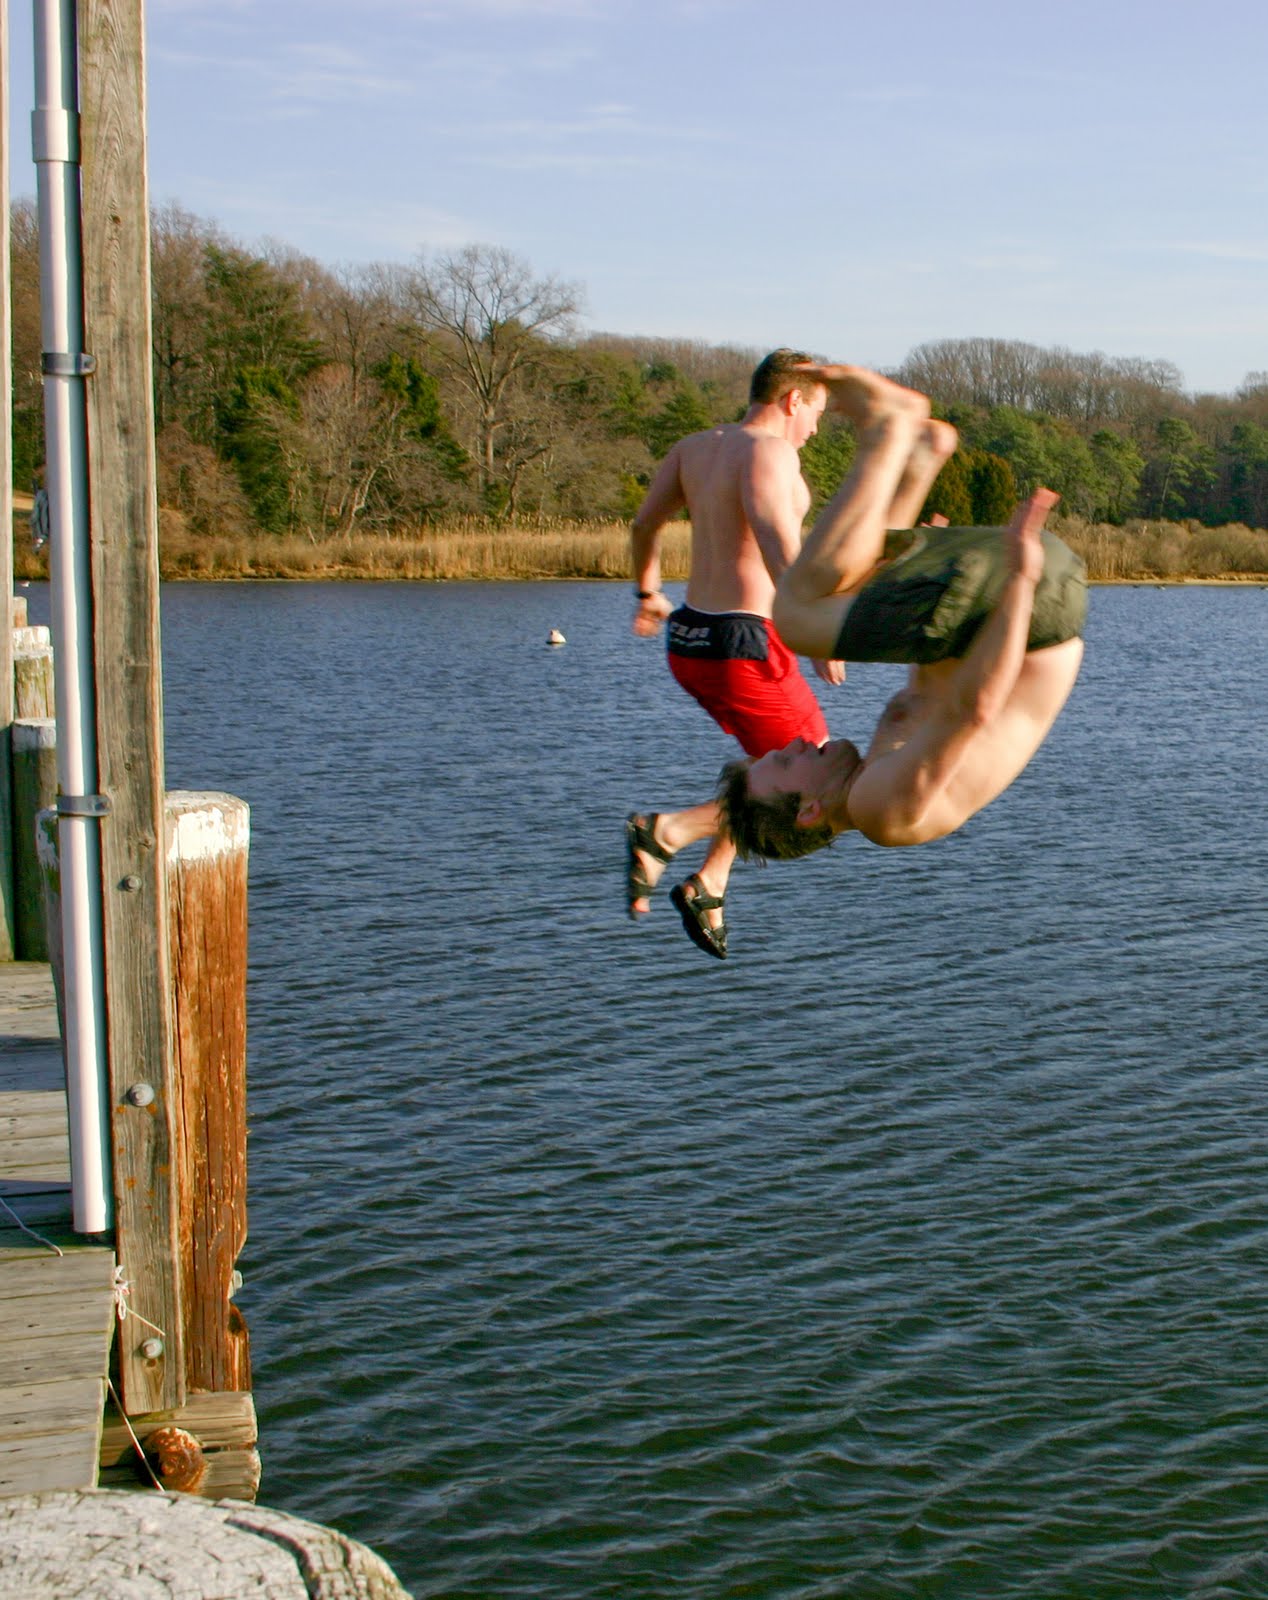
2010/01/01 - Kirkland

2010/01/01 - Kirkland
Thanks to all who celebrated with me this year and in year's past. Happy New Year!
Labels: Adventure
Low-cost, highly personal iPhone Case.
 I got a used iPhone from Lisa, (Thank you!) and I have been enjoying the device quite a lot. In short, it's a great "lifestyle" device but a so-so phone. That is a reasonable tradeoff for me, since i make relatively few calls.
This phone is the first generation iPhone, so I don't get a GPS, or fast 3g data. It also has a crack in the digitizer, but it is in the lower-left corner and not very distracting. (The digitizer is the glass pane above the screen itself which receives the touch inputs. On the new iPhone, this is separate 15$ part that you can replace with some saavy, on this generation, it is glued to the screen itself, so a replacement would cost 100+ dollars, which I am not convinced is worth it.)
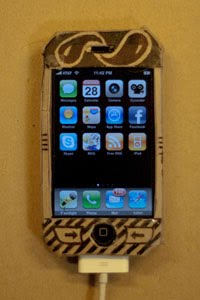
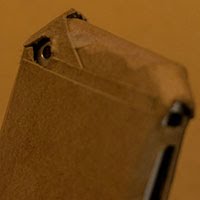
I ordered a charging cable online, since I wasn't that concerned about how the charger looks and feels in everyday use, but I wasn't really interested in buying a 30$ case for the phone, and the 5$ cases look pretty lousy. That said, I didn't want to break the device before buying a case.
I gave myself 10 minutes the other day after lunch, to fashion a makeshift case out of the cardboard backing to an empty legal notepad. I placed the phone face-down in the middle of the cardboard, and traced the outline of the phone. I drew a circle roughly where the home button is, a big square for the screen and a slit for the speaker, and cut them out with an x-acto. I made slits at the corners with a pair of scissors, scored the four edges and folded it around the phone. A couple pieces of scotch tape finished the task in a total of 7 minutes. The holes for the volume, docking port and camera came later, as did the personalized front plate which was implemented with ink and sharpie.

Labels: Geek, Ghetto Hardware, iPhone
Processing Digital Photos, from the Camera to Screen or Print
Anyone who takes a lot of photos knows that the time spent behind the camera is only one small step to getting an image you are proud of onto the web or printed. Higher-end cameras tempt you to make this process harder by capturing your photos in their RAW format whihc requires processing to get the photo into the industry standard JPEG format which you can send to your friends and your mom.
The leader in RAW processing is Adobe with their popular Adobe Photoshop Lightroom application, now in version 2. Lightroom makes it possible to assign tags to your photos, rate them and apply improvements to the colors, brightness and contrast before exporting a JPEG file to post to your blog or to send to the printer.
Workflow:
While Lightroom is more powerful and easier to use than some of it's competitors, I would hardly call it "easy". Photographers describe the myriad of steps they use to take a RAW digital photo on the camera and turn it into something that they can share "Workflow".
My workflow is probably less complex than most professional photographers, but it is still cimbersome enough that I regularly get months behind in processing my photos. My workflow begins in the first tab in Lightroom labeled "Library". In this phase, my goal is to 1) label the photos appropriately so I can get back to them in the future and 2) identify those photos which are good enough to share, and those which look like they could be great.
1) Labeling
To label the photos, I assign tags to the people in the photo, and will sometimes add a short description of the photo. This is also when I try to assign the location where the set of photos was taken by specifying the Country/State/City/Location. Recently, I have tried to assign coordinates to my photos by using clever software that uses a tracklog with the timestamp on the photo to interpolate where the photo was taken. (A tracklog is a recording on a GPS device of where you are every 30 seconds.) Lightroom should really include built-in support for this, but in the meantime a person named Jeffrey Friedl has created a Lightroom plugin to assign the coordinates where a given photo was taken based on a tracklog from the same period.
I also assign a Star rating to the photos which I like. Roughly speaking, I assign 2 stars to any photo which is either decent, or a poor quality image that is important to tell the complete story of an event. I try to assign 3 stars to the best 2 to 4 photos of a given event. These are good photos, but not my best. 4 stars is meant to mean "excellent", a photo which is great both in subject and composition. 5 stars is a concept I challenge with. I know my photos could always be better so I am hesitant to give anything this rating. I do take good photos, so I should me more willing to rate a few photos a year "5 stars"
2) Processing
After tagging, I must process the photos. This varies greatly from photo to photo, but the most common changes I make are an adjustment to the brightness of the image, the increase of Contrast, and tweaking the balance of brightness and contrast in the shadows. I also use the Neutral Density Gradient filters pretty often to correct a blow-out sky. If none of this is enough to make the subject, usually someone's face, bright enough or having enough contrast, then I will use the localized tools to correct the broghtness / contrast in an area of the image. Both of these localized edits are new to Lightroom Version 2
Finally, after tagging and processing, I export my photos which are 2 stars or greater into my public photo library. This generally yields 1/2 to 3/4 of the original photos. When I export photos, I keep the standard resolution and set the JPEG compression settings to 80 of 100.
Labels: Photography, RAW, Workflow